 You get a map with a numbered series of circles, called "control
points". The start is a triangle.
At the control points there will be a flag and clipper. You prove
you have been there by clipping in the right box on your control
card. Some events use electronic boxes at the controls, and you carry an e-stick which records your visit.
You get a map with a numbered series of circles, called "control
points". The start is a triangle.
At the control points there will be a flag and clipper. You prove
you have been there by clipping in the right box on your control
card. Some events use electronic boxes at the controls, and you carry an e-stick which records your visit.
Between the controls, there are no course markings (with one or two exceptions, below). You use the map to get there. And usually there is a choice of routes you can take.
There's an alternative called a "Score Event" in which you can visit controls in any order within a time limit. Usually everybody blasts off at once. Controls have various scores, and highest score (less a stiff lateness penalty) wins.
We sometimes make "tracks-for-the-day" by marking a route with intermittent or continuous coloured tape. There'll be a sample of this tape at the start. The tape is sometimes also used on indistinct junctions so that you know what we consider to be a track
Bikers: it's worth taking time to suss out the best way, even if it means stopping. Going down the wrong track can waste more time than riding brilliance can make up. Remember the hare and the tortoise!
 If the map is specially made for MTBO, the roads and tracks are
shown with two different widths and four different speed values.
If the map is specially made for MTBO, the roads and tracks are
shown with two different widths and four different speed values.
This is a NZ invention and may not apply in other countries. To sum up, a green line means "allowable route, no visible track".
There are special colours where you are allowed off-track. This is new and it may take a while for some maps to catch up - consult the legend. WHITE is forest that you may use - but speed is fairly slow at 25-50%. BRIGHT YELLOW (as opposed to pale yellow) is open land that you may use - also 25-50%. The purpose of these is to make it clear where you can go in areas where tracks are indistinct, or two tracks almost touch.
The map shows things you can see from the track. Examples might be power pylons, water tanks, cliffs. Special attention is paid to the shape of junctions, and whether they are distinct or not. (A small gap indicates an indistinct junction.) A bridge is shown by the road or track crossing the blue line, otherwise there's a gap.
Tracks you're not allowed to use have purple crosses or a purple zigzag on them. Whole areas you're not allowed to use have purple shading on them. Don't get us into trouble with the community, we want to be able to ride here again.
A purple bar across a track is used for an obstacle that will force you to dismount - eg a gate or fallen tree. It's perfectly allowable to go over an obstacle, this is merely something you might take into account when deciding which route to take.
There's a legend on the map, and you should be able to check it out before the start. There are some (beginner) MTBO maps on the Orienteering Hutt Valley website. Do a search on "MTBO".
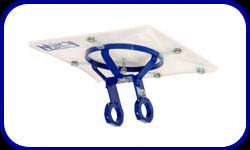 Ideally you need to be able to see your map on the move, so a carrier
on the handlebars is a big help. The best ones have a pivot that
lets you rotate the map to line up with the way you are going. For
example go to the
MAPsport SHOP website.
The cheapest ones are made of tin-lids, ice-cream
containers, you name it. For example go to the
resources section of this website.
Ideally you need to be able to see your map on the move, so a carrier
on the handlebars is a big help. The best ones have a pivot that
lets you rotate the map to line up with the way you are going. For
example go to the
MAPsport SHOP website.
The cheapest ones are made of tin-lids, ice-cream
containers, you name it. For example go to the
resources section of this website.
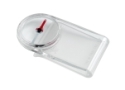
Orienteers are used to holding their thumb on the map at the current position, and this is even more useful on the bike when you might only have a few seconds to glance at the map. Some orienteers have fitted their mapholder with a thin sheet of steel, and a powerful magnet can act as your "thumb" to mark position.
The normal orienteering clipper is on the top of a 1m stake. If these are used, the best way to carry your control card is tied on your wrist with elastic or a big rubber band. (It's got a couple of holes punched in it and is made of tough synthetic paper.)
The New Zealand rule is that the control card is attached to
the bike by the organisers. If we use this method we hang the clipper
on a long enough string to reach your bike. It will be attached to
the control flag which will be hanging from something on the side of
the track.
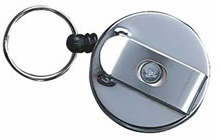
If electronic punching is used you should acquire one of those pull-out "zingers" that some people use to attach their security card. This way your e-stick can be (a) attached to the bike and (b) reach the control box on its stake. Clever people can e-punch without dismounting!
 As long as you don't use the "magnetic thumb", a clip-on compass (eg Silva Type 19) can slide on the side of your mapboard. But the magnetic thumb is very powerful and you can’t have a compass that close to it. And the clip-on compass is not well-damped, it shakes a lot.
The best solution is to cable-tie a good-quality thumb compass to the top tube near the stem, with a little bit of foam between to insulate it from the vibration. (A standard compass is a bit big for this.) Or slide a clip-on compass onto one of your gloves so that it sits on the back of the hand.
 Wear a helmet. The route may be on public roads and forest roads
that have vehicle traffic so you should take due care.
Wear a helmet. The route may be on public roads and forest roads
that have vehicle traffic so you should take due care.
Even on tracks you should ride as if you're going to meet yourself coming the other way. If you're coming up fast behind a slower rider, call out the side you are going to pass on, eg "on the left!" If someone comes up behind you, look for an opportunity to let them past. On single track use the MTB convention that downhill gives way to uphill. If you don't know which way to go at a junction, get off the track while you decide.
The tracks are open to other users too, be courteous to them. Report to the finish, even if you decide to abandon the course. After doing a search we get very annoyed to find you've just gone home!
 We don't put marshalls on the course so we rely on you, the other
competitors. Each incident is different, but hopefully the first
rider on the scene can give first aid while the second can head
straight to the finish and report to the controller. The controller
will have a rescue plan including who would go out on the course and
what vehicle they would use - 4WD might be needed for some areas.
We don't put marshalls on the course so we rely on you, the other
competitors. Each incident is different, but hopefully the first
rider on the scene can give first aid while the second can head
straight to the finish and report to the controller. The controller
will have a rescue plan including who would go out on the course and
what vehicle they would use - 4WD might be needed for some areas.
We encourage carrying a cellphone, and try to put a contact number on the map. But you mustn't use it except in an emergency.
Here is a Sample Legend which shows most of the symbols that you are going to need.
Here are the NZ MTBO Rules. A simple statement of what you can and can't do out on the course.